To set a product for sale:
- Go to your admin dashboard after logging in
- On the menu bar above go to “Inventory” then “Products”
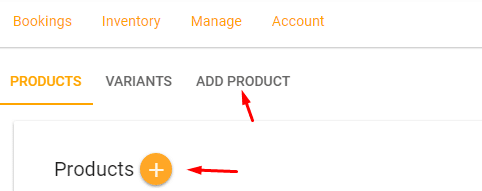
- To add a new product, you can either click on the tab “Add Product” or the “+” sign next to “Products”

Make sure on the top of the screen that the “Rental” toggle bar above is set to off “Grayed out” not “Red”. If not then select it so that is “Grayed” out.
- In the name field give your product a name
- For “Category” select the root category for the product that you are selling
- Under that selection, the proper sub-category is selected for your item.
- For Maintenance / Grace Period add the number of days that you would like to add ahead of tomorrow’s date (The system by default allows customers to book for the next day after today’s date)
- Under the “Variants” section click “Add Another Variant”
- Fill in the section with any name, size, price, and stock level (If you have an unlimited stock of the item you are selling then do not enter a stock level here. All the way up top find the “Unlimited” toggle and click on it to enable it and it should turn red. From there, your stock level should say “Unlimited”
- Under “Additional Images” you can upload more images to display your item
- Scroll all the way to the bottom to the section “Description”
- Write an eye-catching and detailed description of the product that you are selling. Remember the more detailed you are and the more information that you provide the more chances you have of making a sale and fewer customer inquiries regarding the product.
- When completed click “Save”
Now that your product has been created and submitted for approval. After your product has been reviewed if all is well the product will be approved and live on the site. In the event, something is wrong with your product a staff member will reach out to you for corrections.


